Download & Installation
You can download the latest version below and install the application. After the installation is complete you can start Aurora from the newly created shortcuts on your desktop and from your start menu.
You’ll be able to start creating your characters using the bundled content from the System Reference Document. Alternatively, and recommended, you can include additional content first.
When a new version is available you will be notified in Aurora and on the website. Simply download and install the new version over your previous installation.
Below is a quick start guide creating a character and saving your character sheet to PDF ready to print.
Character Creation
Before you start, you might find it helpful to think about the basic kind of character you want to play. You might be a courageous knight, a skulking rogue, a fervent cleric, or a flamboyant wizard. Or you might be more interested in an unconventional character, such as a brawny rogue who likes to mix it up in hand-to‐hand combat, or a sharpshooter who picks off enemies from afar.

This software is in preview and this quick start guide was made for version 1.19.309. The user interface might alter slightly from the information below.
Building Bruenor
This quick start video makes use of the step-by-step character creation process, “Building Bruenor”, that is included in the Player’s Handbook on page 11. Aurora automatically takes care of a big part of the creation process so some tasks in these steps are done for you.
When you’re creating this character with the bundled content and have not yet included the additional ‘core’ files, choose the Hill Dwarf instead of the Mountain Dwarf if you want to follow along.
Bob is sitting down to create his character. He decides that a gruff mountain dwarf fits the character he wants to play.
Building Bruenor, Step 1
Bob imagines Bruenor charging into battle with an axe, one horn on his helmet broken off. He makes Bruenor a fighter and notes the fighter’s proficiencies and 1st-level class features on his character sheet.
Building Bruenor, Step 2
Bob decides to use the standard set of scores (15, 14, 13, 12, 10, 8) for Bruenor’s abilities. Since he’s a fighter, he puts his highest score, 15, in Strength. His next highest, 14, goes in Constitution. Bruenor might be a brash fighter, but Bob decides he wants the dwarf to be older, wiser, and a good leader, so he puts decent scores in Wisdom and Charisma.
Building Bruenor, Step 3
Bob decides that Bruenor comes from a noble line, but his clan was expelled from its homeland when Bruenor was very young. He grew up working as a smith in the remote villages of Icewind Dale. But Bruenor has a heroic destiny—to reclaim his homeland—so Bob chooses the folk hero background for his dwarf.
Building Bruenor, Step 4
Bob writes down the starting equipment from the fighter class and the folk hero background. His starting equipment includes chain mail and a shield, which combine to give Bruenor an Armor Class of 18. For Bruenor’s weapons, Bob chooses a battleaxe and two handaxes.
Building Bruenor, Step 5
User Interface Overview
Start
The first time you launch Aurora it will appear a little empty. After you create and save your first characters they will be displayed in the Start tab. When you save characters you can group them together and mark a character as ‘favorite’ which will place them first in the group.
New Character
Choose ‘New Character’ to start creating your first character. In the interface that is presented to you you can enter some basic information about your character such as a name, starting level, and how you want to generate your ability scores.
When you choose the Standard Array (15, 14, 13, 12, 10, 8) you can determine your scores by dragging and dropping them around on the desired ability. Change the option to generate ability scores afterwards in the application settings.
All entries can be changed anytime after you create your character.
Character Options
The character options are often optional rules that you can enable or disable for your character, the user interface will change sometimes depending on what options you enable or disable. When you want to roll for your hit points each time you level up in your game you can disable the average hit points option for example.
Your DM might create a custom option so that all characters in his or her campaign might get a small boost to hit points, a bonus feat, or an extra language at the start (or at certain levels).
These options can also be changed after you create your character using the menu with your character name in the title bar.

Start 
Character Collection 
New Character
Character Menu
After creation the user interface will automatically navigate to the build tab and a menu at the top of the application with the name of your character will appear. From this menu you can save your character, change the character options, save your character sheet, and more.
Build
In the build tab you can select most of the elements that will eventually make up your character, such as your race and sub race, class and archetype, background, and more. Each selection option has a list of choices available to you which you can select by double clicking them. Some options require you to meet certain prerequisites such as a minimum ability score or a specific race or class, these options will be available to you as soon as you meet these requirements.
When your race has options for sub races a new selection picker will appear in the Race tab under the race selection. The same applies to the other tabs in the Build tab. You archetype selection will appear in the Class tab after you selected a class and meet the requirements for your archetype selection, usually level 1, 2 or 3.
When you have selected the Feats character option you will have the choice to select either an Ability Score Increase or a Feat at certain levels (4+). These options appear in the Class tab.
When you have no ability to select a certain type of element such as a feat or a language, the tab will be entirely empty apart from a message saying that there are no options available.
Some selection pickers are optional and will say so in the header, you can decide if you want to pick anything here. Sometimes these selections are variants on other selections such as the Variant Human on the Human race, or variants on Backgrounds. There are also optional selections that don’t directly implement rules but are for roleplaying such as your former occupation in a background but these are not yet used by the application.
When you select any of the options in the selection option, details about this selection appear in the description panel on the right. Here you can read everything related to the selection. When you want to know more about the selection, there is a link at the bottom of each description that will open a browser window with details about the source of the selected option.
You can also make a snap shot of the description and save it as an image by clicking the picture button that appears in the upper right corner when you hover over the description panel.

Race 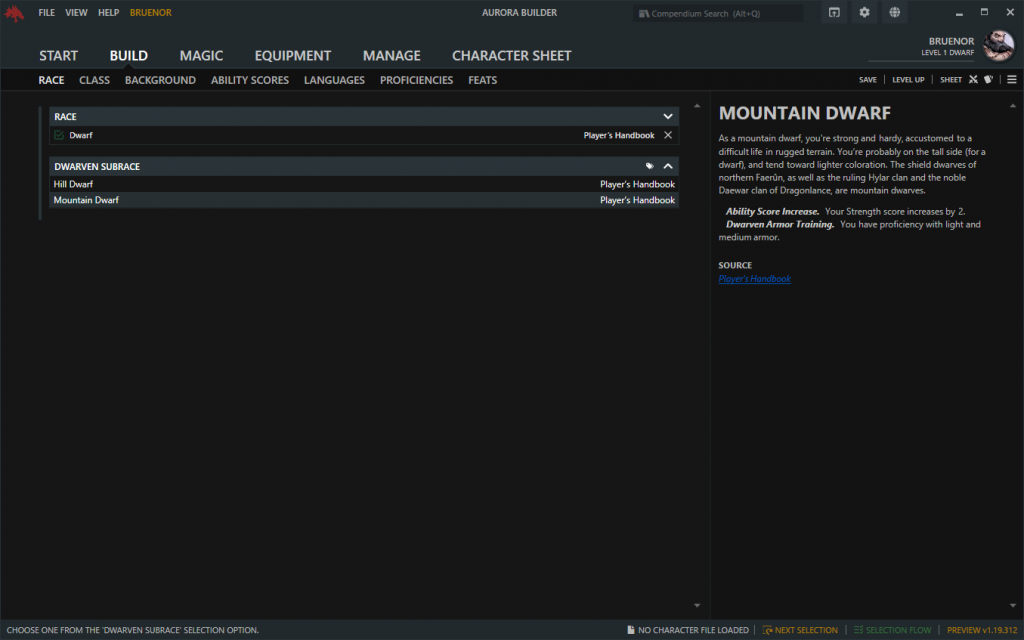
Sub Race 
Class 
Class Feature 
Background 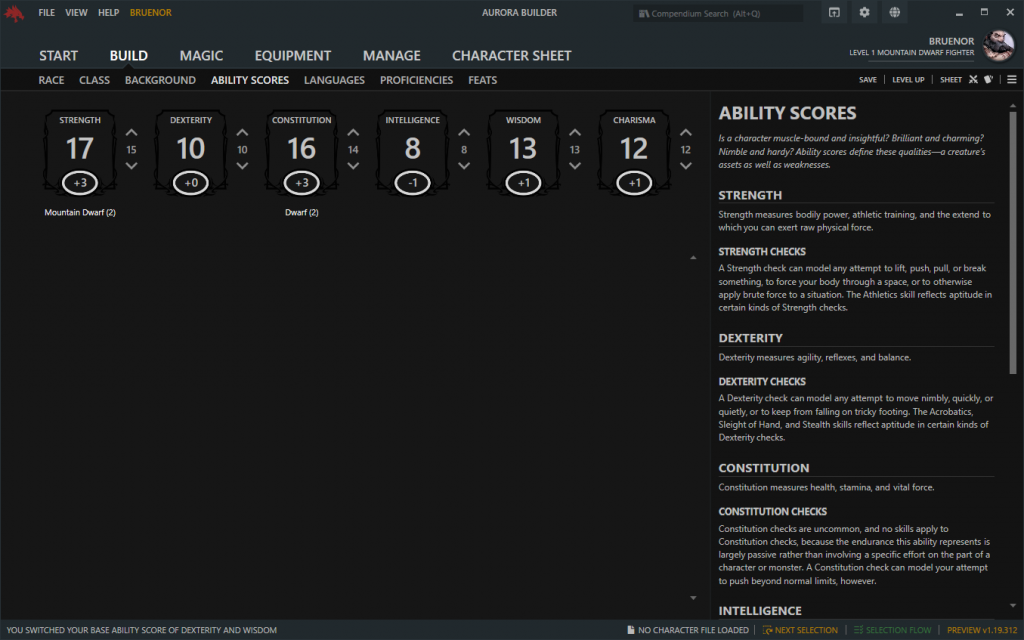
Ability Scores 
Proficiencies 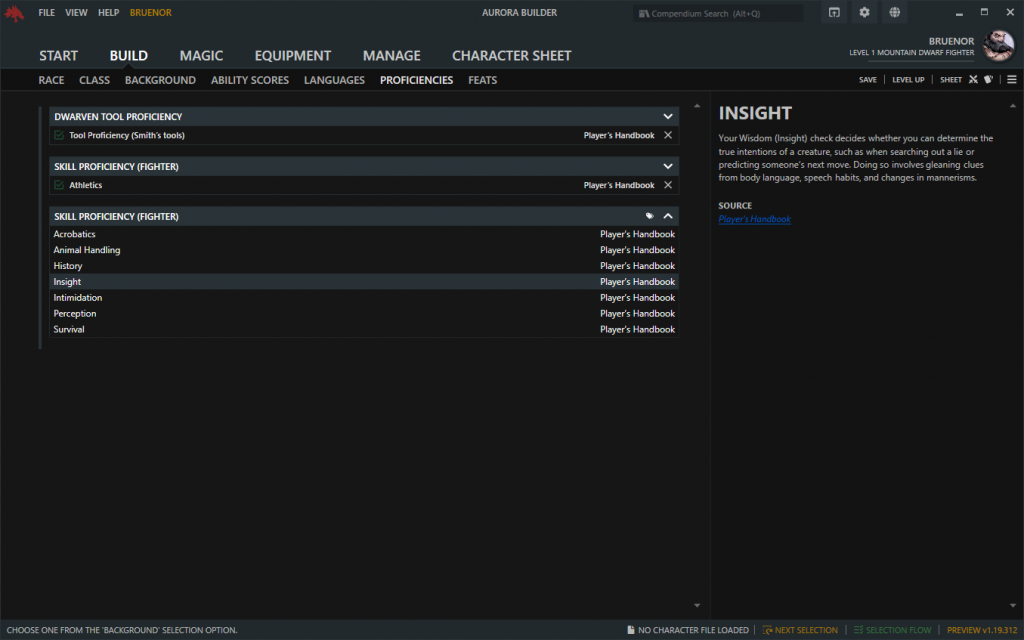
Proficiencies
Ability Scores
Depending on the Ability Generation Option you have selected you can generate your ability scores in the Ability Scores tab under the Build tab. You can for example increase and decrease the base score if you have the points buy options. Alternatively, you can generate random scores in other options. You can also drag and drop the scores around on top of each other to switch them.
When you get ability score improvements from your class (or other sources) selection options for those abilities will be added to this tab.
The maximum ability score of 20 can be ignored by unchecking the option in the application settings. The initial scores that can be put in are between 3-18 (the minimum and maximum of the 3d6).
Spells
When you have selected a class or archetype that has spellcasting you might need to select cantrips, known spells, or prepare spells from your spell list.
There is one tab for spell selections that has filters you can use while selecting a spell. You first select one of your selection options at the bottom. When you do so, the list of spells will populate and you can double click any spell to select it. You can select another spell instead simply by double clicking it.
Each spellcasting class or archetype has an individual tab with its name right of the spellcasting selection tab. Here you can find information about your spellcaster such as the ability with which it casts spells, its attack modifier, difficulty class, and spell slots available to you. It also has a list of selected spells and cantrips that are available to you.
When your spellcasting class requires you to prepare spells you will see this also in the bar at the top. You can prepare a number of spells by double clicking any spell that is in your list.
Equipment
You can select and add items to your inventory, they will be listed on your character sheet. Also, you can manage your coins (currency, gold etc.) from the equipment tab.
You can equip items from your equipment in certain slots when the item allows you to do so. Only items that are equipped are taken in account in statistics such as AC. Also, there are class features that grant certain bonuses depending on you having equipped no heavy armor or no shields. These statistics are calculated aswell depending on the equipped items.

Armor 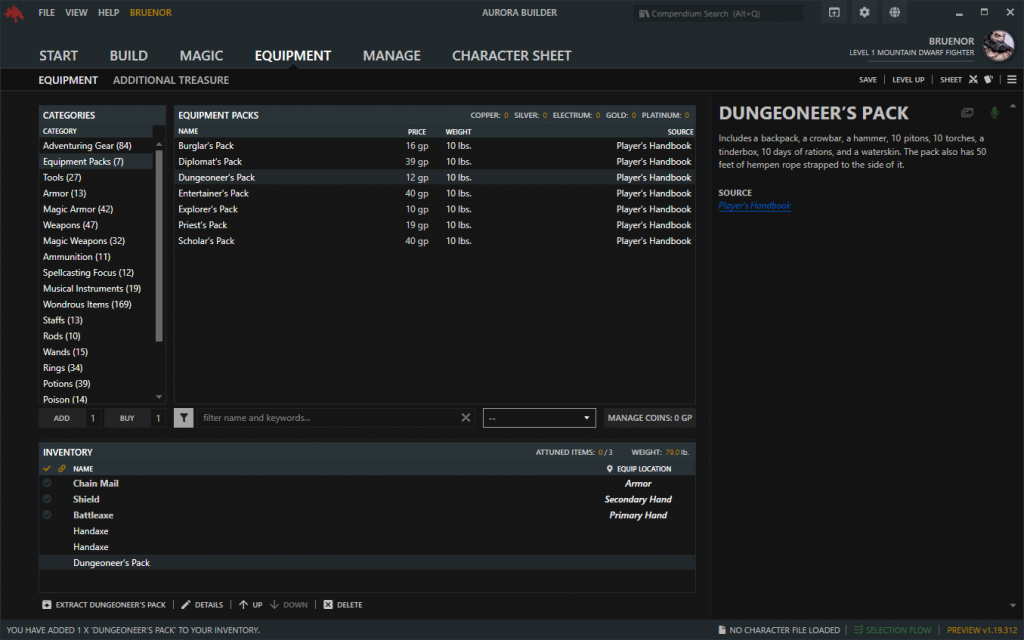
Packs
Manage Character
All other details about your character, such as your name, age, height, skin color, background description, allies, trinket, and more can be changed here. This is also the place to select your alignment and optionally a deity.

Manage Character 
Manage Attacks
Character Panel & Portrait Gallery
In the upper right corner of the builder you have a small round portrait of your character. You can click this to bring up an information panel with a small summary of your character. This panel shows your proficiency, hp, initiative, speed, hp, ac, skills, saving throws, and various additional statistics depending on the character such as sorcery points or ki points.
Click your big portrait here to bring up the portrait gallery (or use CTRL+P) to change the portrait or import a custom portrait.

Details 
Portrait Gallery
Character Sheet
In the Character Sheet tab you can preview your sheet. You can enable several settings to adjust the output of your character sheet when you save it. There is a setting available to append spell cards to the end of your sheet, flip ability scores with the modifier, and enable edit mode on the sheet so it can be editable afterwards in Adobe Reader for example.

Character Sheet 
Character Sheet
Leveling Up
At some point you’ll want to advance to the next level. You can do this from the level up & multiclassing interface. When you level up a class you might have new selection pickers available to you. Also, when you meet the requirements for multiclassing you might want to add a multiclass from the same window instead of leveling up your current class. When you do so, you can selected a new class from the Class tab in the Build tab.
When you don’t have the Average Hit Points character option selected, the interface allows you to change the roll of your hit dice (hp) for that level. By default there is a random value generated. (The first level of your main class is always the maximum roll)

Level Up
Save Character File
When you have finished creating your first character, don’t forget to save it! Your characters are currently stored in your personal documents, in the ‘5e Character Builder’ folder. (You can use the CTRL+S shortcut to open the interface to save your character.)